There are two ways to enter information in to the database. There is the Datasheet view in the Table area. With this option, you can see several records at one time, depending on the size of the screen. The other option is using a Form. Forms allow users to enter and view one record at a time. This is usually less confusing for the user as there is not as much clutter on the screen to confuse them. The forms can be customized by changing everything from the type of font to the colors used.
To create a new form, click the Forms tab in the main window and click the New button.

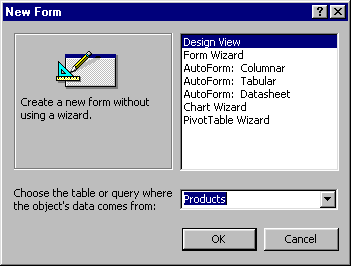
The New Form window will appear:

We are going to use the Design View. Click the Design View in the list. Click the down arrow and select "Products" from the list. Click the OK button.
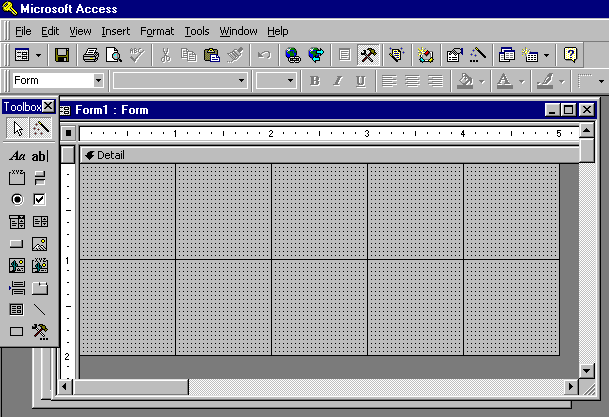
Here is the display of the Form Screen:

The gray background area is the work area where objects will be placed. The toolbar below the menu shows list of different options to select from. The Toolbox is a display of the different types of objects that can be placed on the background.
A label object is the equivalent to a title. It a static object, so it does not change as you go from one record to the next. Since we are dealing with Farmer Joe's Market, let's add in a title for it on our form.
We now have a label that looks like this:

Adding a Text (Control) Object
A Text Object will be the one that is most commonly used. These types of fields are the ones that change depending on the which record you are on. They can handle data from the table itself or can contain calculations in them. There a two different ways we can use Text Objects.
The Toolbox Button

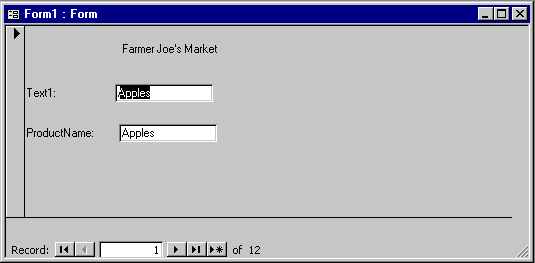
The white box represents the information that is stored in that field in the table. Later when View this, this field will show us all the different products we have as we go from one record to the next. Using this method, you have to manually modify both the Text Object and the Label Object (this is the one that says "Text1"). You can modify the Label Objects by following steps 4 and 5 above.
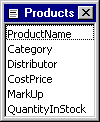
The Field List box

Using this method, the Text Object and Label Object are filled in automatically.
![]()
The Label Object is filled in with whatever the field name is unless the Caption option for that field in the Table Design was changed.
So far we have been working in the Design View, which really does not show a nice impression of the work you have been doing. The Form View shows the actual information that is stored in the tables.
To switch to the form view, click the View
![]() button on the far left of
the toolbar.
button on the far left of
the toolbar.
The Form View for the form should be displayed.

Here is a list of the different ways to move around in the Form View.
| Item | Description |
| First record in the table. | |
| Previous record in the table. | |
| Next record in the table. | |
| Last record in the table. | |
| First record in the table. | |
| Ctrl - Home | First record in the table. |
| Ctrl - End | Last record in the table. |
| Page Up | Previous record in the table. |
| Page Down | Next record in the table. |
| Tab | Go to the next field to the right. |
| Shift - Tab | Go to the next field to the left. |
| Arrow keys | Goes to the field in which ever direction you press. If you are in the last field on form, by pressing the down or right arrow will go to next record. |
| Home | First field on the form. |
| End | Last field on the form. |
To return to the Design window, click the
Design ![]() button or select
View, Design View from the menu.
button or select
View, Design View from the menu.

Type in "ProductList".